Create a template to reply from the official university e-mail.
Creating a template makes it easy to reply to all incoming messages to you via one special template to save your time, instead of creating a template and its own formats in each reply.
.
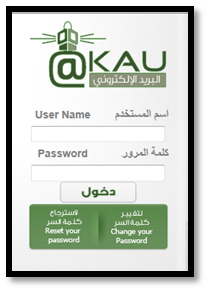
First: Register the official university email through the following screen:
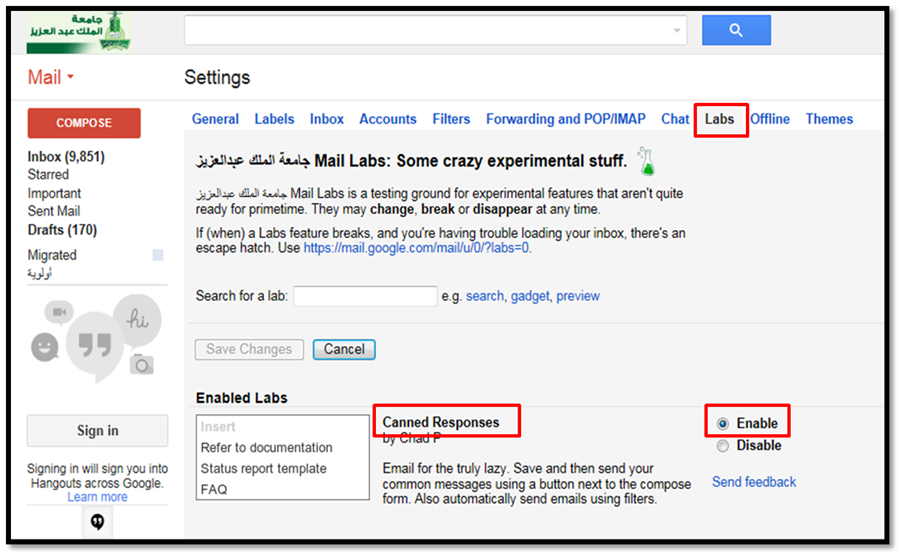
Second: After completing the login process, click on the images of the gear of the mail setup, then click on (Settings) as in the following picture:

Third: We select the tab labeled (Labs), activate the item labeled (Canned Responses), and save the changes as in the following picture:
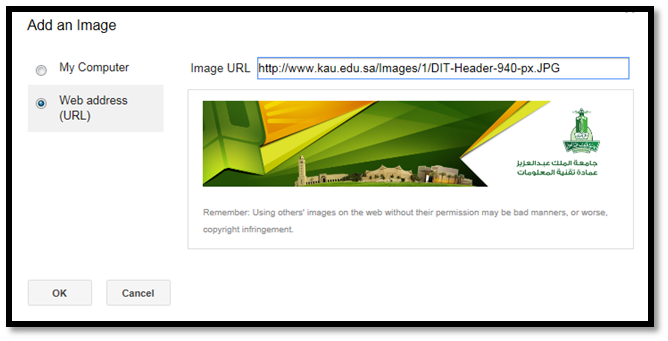
Fourth: We create an empty message, in which we put the pictures and texts to be placed in the reply template. The picture is inserted in the message by clicking the button (Insert Photo) which is one of the lower icons that appear when you move the mouse over the plus sign (+). At this stage, the next screen appears. It enables us to insert the picture from the personal device or from a site link. Then, we press (OK) and the image will be included in the message.
Fifth: The template is ready. We save it by clicking on the arrow on the far right of the bottom. Then, we choose the option (Canned Responses), then the option (New Canned Responses). After that, a window, where we should write the name of the template, appears. Then, we press (OK) as in the following picture:

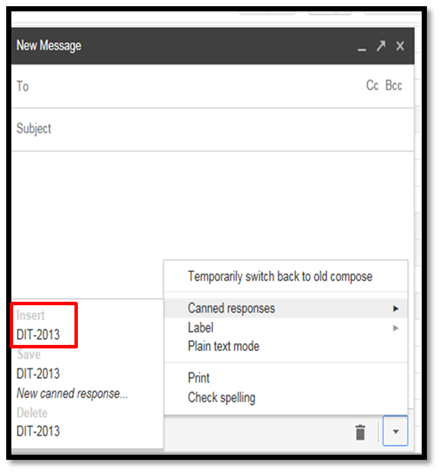
Sixth: You can use the template that was created whenever you want to send a new message or reply to any incoming message by creating a new message or choosing to respond to any message: go to the arrow on the far right, then choose the option (Canned Responses), then choose (Insert) for the template name as in the following screen:
Our template will show as in the following screen:

Note:
In order to display the (Labs) tab, the English mail interface must be temporarily changed and the interface language can be reset to Arabic after (Canned Responses) is enabled.